Pages

Showing posts with label PDF. Show all posts

Monday, 23 September 2013

PDF - highlight text with keyboard


This post shows how to highlight selected text in Adobe Acrobat using just the keyboard, after you select text with the keyboard.

In Adobe Acrobat 8 Professional and other versions of Acrobat, you can highlight text using the Highlight Text tool by selecting the tool, then dragging the cursor over the desired text using the mouse.

Not good enough for me. I don't want to highlight text with the mouse, I want to select text with the keyboard, then use a keyboard shortcut or hotkey to highlight the selected text.

I tried selecting text first with the keyboard (using the Select Tool and the usual Shift keyboard shortcuts), then clicking on the Highlight Text tool, but that didn't work to highlight the selected text.

The secret workaround? After selecting text with the keyboard (by holding down the Shift key then using the arrow keys, End, Home, PageUp, PageDown etc to navigate in the usual way):

  • rightclick the selected text or
  • use the Windows key for the rightclick context menu (usually to the immediate left of the right Ctrl key on the keyboard), or
  • press Shift+F10 (ie while holding down the Shift key press and release the F10 key)

This brings up a context menu which, aha, allows you to  highlight the pre-selected text with the h key. In other words, to highlight text using only the keyboard in a PDF: select text with the keyboard, press the context menu key or Shift+F10, then press h, and voila!

Unfortunately sometimes (not always) the Select tool that lets you select text with the keyboard may vanish or turn into the Hand tool. To get the Select tool back again using the keyboard, try pressing the Esc key, or either press e (quickest, but sometimes inserts the letter e instead!) or press the context menu key or Shift+10 again and then press e. As usual, Ctrl+z is the "undo" hotkey combo, and tapping the Esc key after pressing the e helps if you find it's adding text rather then selecting them or moving the cursor when you try to use the keyboard.

This tip might seem obvious to some but it escaped me for ages, so I thought it was worth blogging this.

Wednesday, 8 June 2011

How to remove Nuance PDF reader from Firefox (& short review)


If like some people you install the free Nuance PDF reader, then uninstall it but it's still taking over PDFs in Firefox, here is how I got rid of it. It worked for me, but your mileage may vary.

Try these steps (screenshots are from Firefox 4):

  1. In Firefox find your Plugins - in Firefox go to menu Tools, Add-ons (or in the address bar type about:addons and hit Enter), then on the left click Plugins
  2. In the Plugins list, look for all PDF plugins that are NOT "Adobe Acrobat" - in my case the culprit was DocuCom PDF Plus rather than Nuance, go figure. Click the Disable button for that plugin, so that it now gets greyed out and has "(disable)" after its name:


  3. Do this for each non-Adobe PDF plugin. Make sure you scroll down to the end of the plugins list to disable all non-Adobe PDF plugins.
  4. You may also have to disable and then enable the standard Adobe plugin, again go figure but I had to before it would work.
  5. Restart Firefox, just for luck. And hopefully now PDFs will open using Adobe Reader instead of Nuance.

Nuance PDF Reader

Why did I decide against Nuance's free PDF reader? I want to make it clear that I do love their Dragon Dictation app for the iPhone, which is remarkably accurate and quick (and, generously, free).

However, their PDF reader, although it's quite fast, insists on defaulting to the hand tool when I open a PDF, whereas I need it to default to Select to copy/paste text etc.

More importantly, when I rightclick on a PDF in Firefox, Nuance won't show me the document Properties, which I need in order to check the publication date of some PDFs.

There may be a way to change its settings to do what I need, but it's not obvious, and I've not had the time to find it - whereas Adobe defaults to what I need, so I may as well go back to that.

Saturday, 4 June 2011

Convert files free, online - PDF to Word DOC, etc - review of tool


ConvertFiles.com, which I've just discovered, is a very useful online tool, especially to convert Adobe Acrobat PDFs to editable word processing documents eg Microsoft Word DOC format.

You just give the website the URL of a file (starting with http, https, ftp), or you can upload a local file, and it will automatically recognise the file type and offer you a choice of suitable formats into which it can be converted.

Tip: sometimes it won't recognise PDF files where the URL doesn't end in .pdf - so in that situation just download the file and upload it from your computer.

There's a decent range of formats available (see lists below).

Speed - you can download the converted file quite quickly, even for big files.

Maximum file size limits - it will accept files of up to a very generous 200 MB.

OCR - it will even do OCR (optical character recognition) of image files, ie convert scans of images etc to editable text - and, though they don't mention this (they should!), that includes PDF scans, I tried some.

It converted a massive PDF scan beautifully into an editable Word document, with very few errors.

What's more, it's all free, although in gratitude I've checked out some of their advertisers!

Supported formats and conversions

From their FAQs, here's their full list of supported conversions:

ARCHIVE

7Z to RAR, TAR, ZIP, TGZ, TAR.GZ
RAR to TAR, ZIP, TGZ, TAR.GZ
TAR to RAR, ZIP, TGZ, TAR.GZ
TGZ to TAR, RAR, ZIP
TAR.GZ to TAR, RAR, ZIP
ZIP to TAR, RAR, TGZ, TAR.GZ

DOCUMENT

DOCX to DOC, ODT, RTF, SWX, TXT, HTML, XHTML, PDF, PDB, ZIP
DOC to ODT, RTF, SWX, TXT, HTML, XHTML, PDF, PDB, ZIP
ODT to DOC, RTF, SWX, TXT, HTML, XHTML, PDF, PDB, ZIP
RTF to ODT, DOC, SWX, TXT, HTML, XHTML, PDF, PDB, ZIP
SXW to ODT, RTF, DOC, TXT, HTML, XHTML, PDF, PDB, ZIP
TXT to ODT, RTF, SWX, DOC, HTML, XHTML, PDF, PDB, ZIP
ODS to XLS, CSV, RTF, PDF, HTML, ZIP
XLS to ODS, CSV, PDF, HTML, ZIP
XLSX to XLS, ODS, CSV, PDF, HTML, ZIP
PDF to DOC, PNG, JPG
XPS to PDF
CHM to PDF, EPUB, FB2, MOBI, LIT, TXT
PAGES to PDF

PRESENTATION

ODP to PPT, PDF, SWF
PPT to ODP, PDF, SWF
PPTX to PPT, ODP, SWF, PDF

E-BOOK

EPUB to FB2, MOBI, LIT, PDF, TXT
FB2 to MOBI, LIT, EPUB, PDF, TXT
MOBI to EPUB, FB2, LIT, PDF, TXT
LIT to EPUB, FB2, MOBI, PDF, TXT
PRC to EPUB, FB2, MOBI, PDF, TXT, LIT

DRAWING

ODG to PDF, JPG, PNG, SWF
DXF to PDF, JPG, PNG, SWF
DWG to PDF, JPG, PNG

IMAGES, PICS, PHOTOS

BMP to GIF, JPG, PNG, TIF, ZIP, PDF
GIF to BMP, JPG, PNG, TIF, PDF
JPG to GIF, BMP, PNG, TIF, PDF
PNG to GIF, JPG, BMP, TIF, PDF
TIF to GIF, JPG, PNG, BMP, ZIP, PDF

OCR

BMP to DOC, TXT, RTF
GIF to DOC, TXT, RTF
JPG to DOC, TXT, RTF
PNG to DOC, TXT, RTF
TIF to DOC, TXT, RTF

AUDIO

AAC to WAV, MP3, OGG, M4A, FLAC, AU, WMA, AMR
AMR to WAV, MP3, OGG, WMA, AAC, FLAC, AU, M4A
AU to WAV, MP3, OGG, WMA, AAC, FLAC, AMR, M4A
FLAC to WAV, MP3, OGG, M4A, AAC, AU, WMA, AMR
M4A to WAV, MP3, OGG, WMA, AAC, FLAC, AU, AMR
MP3 to WAV, OGG, AAC, M4A, FLAC, AU, WMA, AMR
OGG to WAV, MP3, AAC, M4A, FLAC, AU, WMA, AMR
WAV to MP3, OGG, AAC, M4A, FLAC, AU, WMA, AMR
WMA to WAV, MP3, OGG, M4A, AAC, FLAC, AU, AMR
MKA to WAV, MP3, OGG, M4A, AAC, FLAC, AU, AMR, WMA

VIDEO

3GP to AVI, MOV, WMV, M4V, MP3, JPG
AMV to 3GP, FLV, MP4, MPEG, AVI, VOB, MOV, MKV, ASF, M4V, WMV, MP3, JPG
ASF to 3GP, FLV, MP4, MPEG, AVI, VOB, WMV, MOV, AVI, M4V, MP3, JPG
AVI to 3GP, FLV, MP4, MPEG, VOB, WMV, MOV, MKV, ASF, M4V, MP3, JPG
FLV to 3GP, AVI, MP4, MPEG, VOB, WMV, MOV, MKV, ASF, M4V, MP3, JPG
MKV to 3GP, FLV, MP4, MPEG, AVI, VOB, WMV, MOV, ASF, M4V, MP3, JPG
MOV to 3GP, FLV, MP4, MPEG, AVI, VOB, WMV, MKV, ASF, M4V, MP3, JPG
M4V to 3GP, FLV, MP4, MPEG, AVI, VOB, MOV, MKV, ASF, WMV, MP3, JPG
MP4 to FLV, 3GP, AVI, MPEG, VOB, WMV, MOV, MKV, ASF, M4V, MP3, JPG
MPEG to AVI, 3GP, MP4, FLV, VOB, WMV, MOV, MKV, ASF, M4V, MP3, JPG
MPG to AVI, 3GP, MP4, FLV, VOB, WMV, MOV, MKV, ASF, M4V, MP3, JPG
RM to AVI, 3GP, MP4, FLV, MPEG, VOB, WMV, MOV, MKV, ASF, M4V, MP3, JPG
VOB to 3GP, FLV, MP4, MPEG, AVI, WMV, MOV, MKV, ASF, M4V, MP3, JPG
WMV to 3GP, FLV, MP4, MPEG, AVI, VOB, MOV, MKV, ASF, M4V, MP3, JPG
M2T to WMV, 3GP, FLV, MP4, MPEG, AVI, VOB, MOV, MKV, ASF, M4V, MP3, JPG
M2TS to WMV, 3GP, FLV, MP4, MPEG, AVI, VOB, MOV, MKV, ASF, M4V, MP3, JPG
MTS to WMV, 3GP, FLV, MP4, MPEG, AVI, VOB, MOV, MKV, ASF, M4V, MP3, JPG

OTHER

EPS to GIF, JPG, PNG
PSD to GIF, JPG, PNG

The downside?

Don't expect any support (I emailed them with a query which they never responded to). But hey, it's free.

Thursday, 10 December 2009

How to crop unwanted margins from PDF scans, free


This post shows how to get rid of black margins (or margins showing page edges etc) before printing out PDFs, thus saving money on printer ink and being more environmentally friendly.

Say you scan a few pages from a book to PDF and you want to print it out. Too much black ink is often wasted when printing PDFs produced by scanning pages from books or magazines where the page is smaller than the scanning area, because the space where the scanning area is bigger than the book or journal page shows up in the scan as dark margins, as in the pic below - and similarly when you're scanning photocopies of pages from books or journals. (All copying & scanning done within fair use or fair dealing limits, of course!)

But you can eliminate unnecessarily ink-wasting black margins from your PDFs simply by cropping the margins from the PDF, saving the cropped version, and then printing out the cropped file instead.

A very good free tool for cropping PDFs is PDFill PDF Tools (free for private use).

How to crop black margins from PDFs using PDF Tools

  1. Preparation - open up the PDF file which you want to crop, e.g. in the usual Acrobat Reader. Usually the unwanted dark margins will be on 2 sides of the page. Here is an example (taken from The Future of the Internet by the brilliant Jonathan Zittrain as he's a very nice man who I'm pretty sure won't mind my using 1 page from his book to illustrate this):


  2. Make a note of which sides those extra black margins are on, e.g. top and left, and estimate how much of the page they're taking up and therefore how much needs cropping. E.g. in the UK, with an A4 page size scan, in the above example it might be 0.5" left and 2 or 3" bottom, i.e. you want to remove 0.5" from the left margin and say 3" from the bottom margin. Maybe even about 1.5" from the right margin too, in this case.
  3. If the PDF document is several pages long, as it often is, make sure you page through it quickly to figure out what measurements (e.g. 0.9"?) would deal with most of the bits you want to cut out, while leaving the substantive text untouched. It won't be perfect but at least you should be able to get most of it. If you don't check this there's a danger you might cut out too much.
  4. Download PDFill PDFTools and install it if you haven't already.
  5. Launch PDF Tools.
  6. Click button 4, "Rotate or Crop PDF Pages":


  7. In the file chooser that comes up, select the PDF file you want to crop.
  8. Make sure you tick to select "All pages" on the right, otherwise it will only crop the first page. (That's why in 3. above I said skim through it to work out what measurements would be the best for all pages.)

  9. Then, in the "Crop Box" section on the left, fill in how much should be cropped for each margin, i.e. how much you want to take off from the top margin, left side, right side or bottom margin. It defaults to inches (") as you can see. So for the example in 1. above I'd try - Left Margin 0.5", Right Margin 1.5", Bottom Margin 3" and leave Top Margin alone as 0".
  10. Then click the Save As button and - this is important! - give the file a new name, not the same name as the original PDF document. E.g. you could call it say "scancropped1.pdf". And click Save.
  11. Open your newly created PDF, e.g. scancropped1.pdf, in Acrobat Reader (or Foxit or other PDF reader of your choice) and you'll see the margins are gone. Page through it to make sure you've cropped the margins you didn't want but not lost any important page content. And just print it out from there. This is what my example looked like after I put in the measurements listed in step 9 above - not bad guessing on my part:


  12. If during your skim through you notice it's cropped too much, or too little, no problem. Just start again from step 7 above, but this time try slightly different measurements for how much to chop off, then save the file as a new file (or even overwrite scancropped1.pdf if that was really unusable, but again don't overwrite the original file). Just keep trying till you get it the way you want - with experience it only takes me 1 or 2 goes, and then voila I can print the PDF scan without the dark margins. In the example I showed above, I could even start with the newly saved cropped PDF file, take a bit off the top margin say 0.5", and I'd be there.

And that's it. The PDF Tools suite has some other useful tools for working with or tweaking PDF files, including converting images to PDF and vice versa - just have a play and see (if you hover over a button more info is given, and the Help is good).

Friday, 10 April 2009

Convert / save Word etc files to PDF free, with password protection, using PDF Creator


Here's a tip / howto / review: the free open source PDF Creator is a Windows program which lets you create Adobe Portable Document Format PDF files from any file that you can print – Word documents, Powerpoint slides, JPEG images etc (although note that this program doesn't work so well e.g. with Webpages).

If you wish, you can also require a password to be entered in order to open the PDF file which you create. While no password is guaranteed to be 100% safe and secure, obviously if you're sending a sensitive or confidential document e.g. by email, or storing it on a portable USB drive that you're carrying around which might get lost or stolen, it's probably a good idea to password protect it for security reasons.

Want to password protect an existing PDF file? No problem, this useful tool will do that too.

I'd previously blogged about how you can use the free OpenOffice software to create PDF files from Word .doc or other word processing documents.

PDF Creator also does that, and in addition lets you password protect the PDF files you create, if you wish.

Once you’ve downloaded and installed it, to use it:

  1. Open the document that you want to convert or export to PDF (which could be a Word document or even an existing PDF file), and choose Print.

  2. In the dropdown list of printers, pick PDF Creator instead of your normal printer:


  3. Click Properties just to check the settings are what you want, and change them if necessary:


  4. Then hit OK.

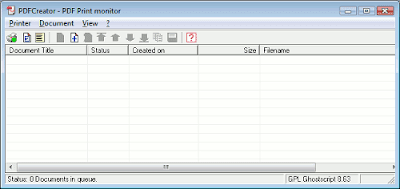
  5. Note that you may need to switch to the PDF Creator window as it may open just in the background, so look for it:


  6. Change the Document Title if you wish, but don’t hit Save yet…

  7. If you want to add password protection, you need to take some extra steps – click Options, outlined in red above, and you’ll get this window:


  8. Now here’s the tricky non-obvious bit – you need to click on Formats, on the left, outlined in red in the pic above

  9. Then make sure you’ve clicked on “PDF” on the left (outlined in red below), so that it says “Adobe PDF Format” at the top on the right; then click the Security tab (again outlined in red:


  10. Now look at the Passwords section in the Security tab (again outlined in red above), and tick the boxes you want e.g. “Password required to open document”, or “Password required to change permissions and passwords”. Usually the first one alone is enough.

  11. Then click Save to go back to the PDF Creator window shown in step 5 above.

  12. At this point, you can now click Save (or Email as you wish – in which case at the end of the process it’ll open your default email program with a new email ready with your newly-created PDF file already attached to it). Then give it a filename and choose a location to save it to, and click Save again.

  13. If you had ticked to add password protection previously in step 10, a box will now pop up asking you to enter the password you want - possibly more than one set of passwords (user and owner), if you'd ticked both password boxes in step 10. Enter the desired password here, which you’ll have to repeat in case of typing errors (though it doesn't have to be the same for both User and Owner, and it doesn't have to be different, it's really up to you). Then click OK. (Note that if you choose Cancel instead of OK, it will still create the PDF – just without any password protection.)


And that’s it. Anyone who tries to open the PDF file you created will have to enter the password first:

If you want to password protect all PDFs you create in this way as standard, you can do the following:

  • open PDF Creator itself (search for PDFCreator via your Start menu if necessary)
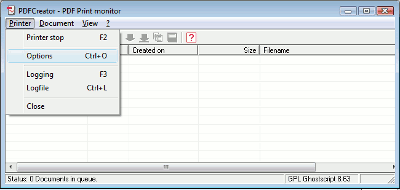
  • go to menu Printer, and choose Options


  • then do steps 8 to 11.
  • (If you later want to create a PDF document without password protection, just change that bit in the Options, see step 7 above).

    Sunday, 30 November 2008

    Convert MS Word .DOC to PDF, free


    How to convert a Microsoft Word DOC document to an Adobe Acrobat pdf file: use the free, open source OpenOffice software suite, which is available in many languages on popular computing platforms i.e. Windows (95 upwards e.g. Vista and Windows XP), Mac OS X and Linux (and even some obscurer operating systems).

    You can download OpenOffice for:

    Once you've downloaded and installed OpenOffice (in version 3 as I write), if you want to "print to" a PDF file (i.e. save your Word document in PDF format), then the conversion method is very straightforward:

    1. Launch OpenOffice and choose Open Document or Open Text Document; or just launch OpenOffice Writer.
    2. Open the Word document you want to change to PDF (menu File, Open).

    3. In the File menu, choose Export as PDF.
    4. That's it, it's that easy! Choose a filename and location for the PDF, and you can then open, email or upload the converted PDF (Portable Document Format) file as you wish.

    Another good thing about OpenOffice is that it does the conversion pretty well. Some other free "conversion" tools can mess up the formatting a little. But obviously, it's still a good idea to open your PDF and check it before you send it out etc.

    Note that the PDF export in OpenOffice only works for Microsoft Office XP or Office 2003 .DOC documents (or earlier versions of Word / Office), not the latest Microsoft Office 2007 .DOCX format.

    As you can tell I think Open Office is good stuff - it's worth trying it out generally as a full free replacement for Microsoft Office; it can save documents to .DOC format as well as its native .ODT format, handle spreadsheets, presentations, etc, and I know a lot of people who use it as their main word processor or indeed full Office replacement suite. Of course you can export .ODT wordprocessing documents to PDF easily from Open Office too.

    I was surprised to find out recently that quite a few people - even some very IT-literate ones - don't know about this free conversion method. So I hope this tip helps. (I've also previously blogged a suggestion on how to convert Word DOC, Excel .XLS or PDF files to HTML for free.)